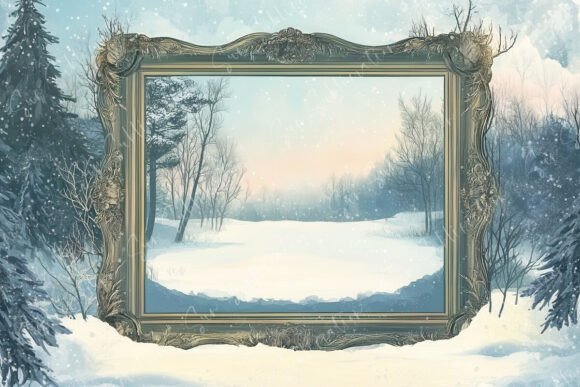
Bringing Winter Serenity Indoors with Decorative Frame Stands in Snowy Landscapes
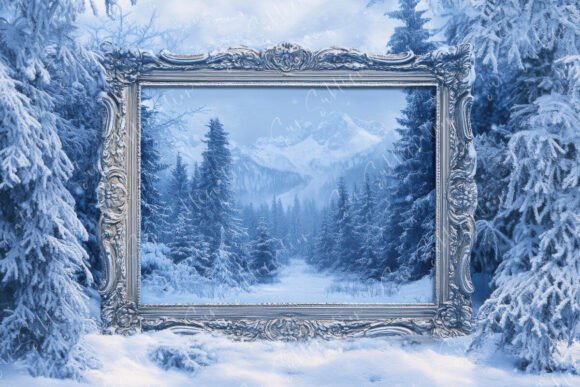
There is a unique quietness that only a winter landscape can provide. The way snow muffles sound, the soft pastel hues of a twilight sky, and the stark beauty of snow-covered trees create a scene that instantly lowers the heart rate. For many creators, homeowners, and design enthusiasts, capturing this tranquility is a priority. This is where Decorative Frame Stands in Snowy settings come into play. These digital assets are not just images; they are tools for blending art with nature, allowing you to curate a serene atmosphere in any space or project. However, moving from a simple download to a professional-grade result requires more than just clicking "buy." It demands an understanding of resolution, color management, and intended application.
When you encounter a listing for a high-resolution winter scene—specifically one boasting dimensions like 4500 x 3000 pixels at 300 DPI—it is easy to assume the work is done once the file is on your hard drive. This is a common misconception. The gap between a stunning screen preview and a breathtaking printed piece often lies in the details that beginners and even some professionals overlook. To help you avoid poor decisions and ensure your final output matches the serenity of the original scene, let's explore the critical factors you need to consider before and after purchasing these digital frames.
The Resolution Trap: Understanding DPI vs. Pixel Dimensions
One of the most frequent mistakes buyers make is confusing pixel dimensions with print readiness. You might see a file described as 4500 x 3000 pixels and assume it is ready for any size print. While this resolution is indeed robust, its suitability depends entirely on how you intend to use it. At 300 DPI (dots per inch), which is the industry standard for high-quality printing, an image of this size yields a print approximately 15 inches by 10 inches. This is perfect for standard photo frames, tabletop displays, or medium-sized wall art.
However, trouble arises when users attempt to stretch this image to cover an entire living room wall without adjusting their expectations. If you try to print this specific file at 40 inches wide, the effective DPI drops significantly, leading to pixelation and a loss of the crisp detail found in the snow-covered trees. The soft pastel sky, which should appear smooth and gradient-rich, may begin to show banding or blockiness. The correction here is simple: always calculate your intended print size against the 300 DPI standard before purchasing. If you need a mural-sized piece, look for files with higher pixel counts or be prepared to use specialized upscaling software, though native resolution is always superior.
The Color Discrepancy: Why Your Screen Lies to You
Perhaps the most frustrating experience for a buyer is unboxing a printed product that looks nothing like the vibrant, glowing image they saw on their monitor. This is rarely a fault of the seller but rather a fundamental misunderstanding of how digital colors translate to physical media. As noted in many product descriptions, colors viewed on the screen will vary from the actual colors on the printed product. Every gadget monitor displays colors differently due to variations in panel technology (IPS, OLED, TN), calibration settings, and ambient lighting.
A common error is trusting a bright, backlit laptop screen to represent the final output accurately. Screens emit light, making colors appear more saturated and luminous than they ever can on paper, which reflects light. The delicate pastel tones of a snowy winter sky might look vivid blue on your phone but print as a muted gray if the printer profile isn't matched correctly. To avoid this disappointment, professionals never rely solely on their default screen settings. Before committing to a large print run or a costly frame, print a small test strip or a thumbnail version on the same paper stock you intend to use. This low-cost step reveals how the printer interprets the JPEG data, allowing you to adjust brightness or contrast in your editing software before the final production.
Navigating the Digital Download Process
Since these are digital products with no physical item shipped, the immediate gratification of an instant download can sometimes lead to hasty file management. A frequent oversight occurs when users download the zipped file and immediately delete it after extraction, or worse, fail to unzip it correctly, leading to corrupted data. Remember, once the transaction is complete, the responsibility for file storage shifts entirely to you. Unlike a physical photograph that sits on your desk, a digital asset can be lost forever if your hard drive fails.
To protect your investment, adopt a disciplined approach to file organization. Upon downloading the zipped file containing your Decorative Frame Stands in Snowy imagery, create a dedicated folder on your primary drive and immediately back it up to a cloud service or an external hard drive. Keep the original ZIP file intact as a master archive. Furthermore, understand that the JPEG format, while universal, is a compressed format. If you plan to do extensive editing—such as color correcting that pastel sky or sharpening the tree branches—save your working copies as lossless formats like TIFF or PSD before exporting back to JPEG for final use. This prevents "generation loss," where repeated saving degrades image quality.
Choosing the Right Medium for the Mood
The content of the image—a serene scene featuring snow-covered trees and a soft sky—dictates the best medium for presentation. A mistake many make is printing high-detail nature photography on glossy paper, which can introduce unwanted reflections that distract from the tranquil mood. The glare from a window or lamp can obscure the subtle textures of the snow, breaking the immersion of the scene.
For winter landscapes, matte or luster finishes are often superior choices. They absorb light rather than reflecting it, preserving the softness of the pastel sky and allowing the viewer to focus on the composition without distraction. Additionally, consider the framing itself. A heavy, ornate gold frame might clash with the minimalist, natural aesthetic of a snowy forest. Instead, opt for simple wooden frames in white, driftwood, or dark walnut to complement the organic elements within the photo. The goal is to let the art blend with nature, not to have the frame compete with it.
Maximizing Value for Creators and Entrepreneurs
For bloggers, marketers, and small business owners, these images are more than decor; they are content assets. A common pitfall here is using the image without optimizing it for web performance. Uploading a 4500-pixel wide JPEG directly to a website can drastically slow down page load times, negatively affecting SEO and user experience. Always resize and compress images for web use while keeping the high-resolution master safe for print.
Conversely, do not underutilize the asset. The versatility of a high-quality winter scene allows it to serve multiple purposes: a website header, a social media background, a printable calendar page, or a physical product mockup. By understanding the license terms and technical specifications upfront, you can extract maximum value from a single purchase. Whether you are an educator creating a calming classroom environment or an entrepreneur designing a holiday campaign, the key lies in respecting the technical limits of the file while leveraging its artistic strengths.
In conclusion, acquiring Decorative Frame Stands in Snowy landscapes is an excellent way to inject tranquility into your life or business, but success relies on informed execution. By respecting resolution limits, calibrating your expectations regarding color, managing your digital files responsibly, and choosing the right physical materials, you ensure that the final result honors the serene beauty of the original capture. Take the time to verify your setup before printing, and you will be rewarded with a piece of art that truly evokes the peaceful silence of a winter day.